
To install Eclipse Oxygen on Windows 10 64 bit, download the installer from the official Eclipse website and run it as an administrator. In just a few clicks, you can have Eclipse up and running on your Windows machine.
Eclipse is a popular integrated development environment (IDE) that is used by developers to create and edit software code. It is open-source and is available for free download from the Eclipse website. Eclipse Oxygen is the latest version of the IDE and comes with updated features and bug fixes.
We will guide you through the process of installing Eclipse Oxygen on a Windows 10 64 bit machine. We will also cover some common issues that you may encounter during the installation process.
Credit: www.eclipse.org
Download Eclipse Oxygen
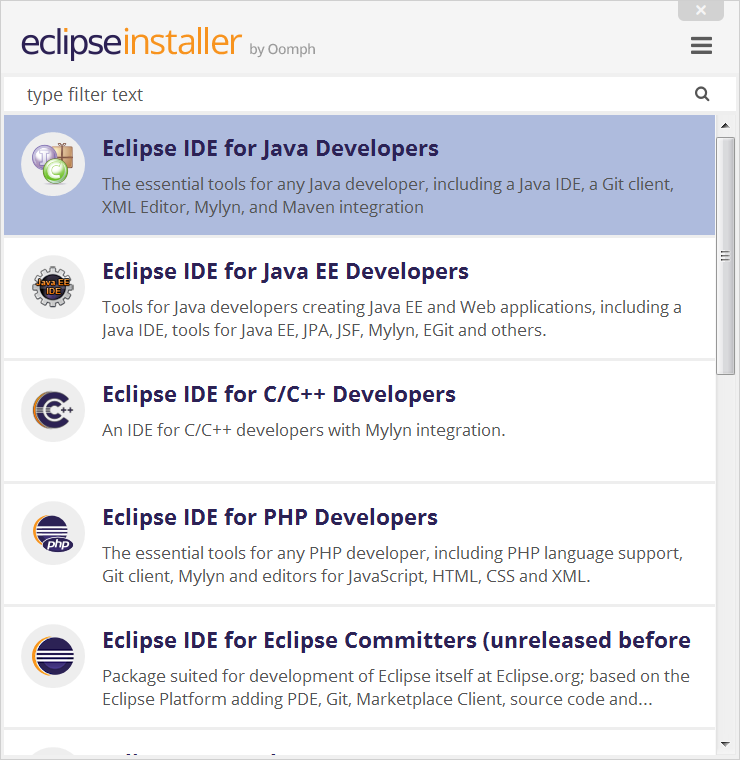
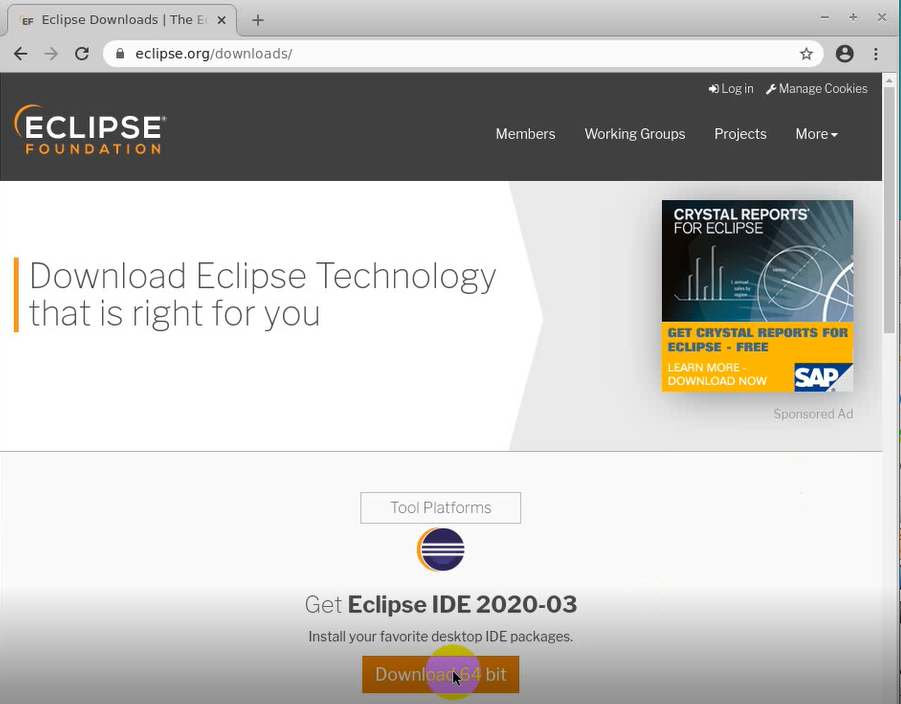
To download Eclipse Oxygen, visit the official website and navigate to the download page. Choose the correct package according to your operating system. For Windows 10 64 bit, click on the download link for Windows 64 bit. Once downloaded, run the installer and select the installation location. During the installation process, you may also be prompted to choose a workspace directory. Finally, click the Finish button to complete the installation process.
| Steps to Install Eclipse Oxygen on Windows 10 64 Bit |
|---|
| 1. Visit the official Eclipse website and navigate to the download page. |
| 2. Choose the correct package for Windows 10 64 bit. |
| 3. Download the installer and save it in your preferred location. |
| 4. Run the installer and follow the setup wizard instructions. |
| 5. Choose the installation location and workspace directory. |
| 6. Click the Finish button to complete the installation process. |
Credit: medium.com
Install Java Development Kit (jdk)
Install Java Development Kit (JDK):
Before installing Eclipse Oxygen on your Windows 10 64-bit computer, you need to check the installed version of JDK. If you don’t have JDK installed or if the installed version is lower than the required version, then download and install the latest version of JDK.
| Step 1: | Open the Command Prompt on your Windows computer by typing cmd in the search bar and pressing Enter. |
| Step 2: | Type java -version and press Enter. |
| Step 3: | If the installed version is lower than the required version, visit the official website of Java and download the latest version of JDK. |
After downloading the JDK, run the installation file and follow the installation instructions. Once the installation is complete, you can proceed with the installation of Eclipse Oxygen on your Windows 10 64-bit computer.
Install Eclipse Oxygen
To install Eclipse Oxygen on Windows 10 64 Bit, first, run the installer. Then, choose the installation directory where you want to install Eclipse. You can select the packages you want to install based on your requirements. It’s recommended to install the Java Development Kit (JDK) along with Eclipse.
Once the installation is complete, you can configure the Eclipse IDE according to your needs. Eclipse allows you to customize the workspace and add plugins to enhance its functionality. You can also configure the settings for code formatting, syntax highlighting, and debugging tools.
Make sure to check for any updates or patches available for Eclipse Oxygen to ensure optimal performance. With Eclipse Oxygen installed on your Windows 10 64 Bit system, you can start developing Java applications and other software projects.
Set Up The Workspace
Open Eclipse Oxygen by double-clicking its executable file. Wait for it to load completely. Once it opens, it will ask you for a workspace location where your projects will be stored. You can either accept the default workspace or choose a different one, depending on your preference. If you’re new to Eclipse, it’s recommended that you use the default option.
To choose a different workspace location:
| Step 1: | Click Browse next to the Workspace field. |
| Step 2: | Select the folder where you want your workspace to be stored. |
| Step 3: | Click OK to save the location. |
Note: Eclipse will create a folder named .metadata inside your chosen workspace folder where it will store its settings and preferences.
Now that your workspace is set up, you can start creating your first project in Eclipse Oxygen.
Customize Eclipse Oxygen
If you want to change the theme of Eclipse Oxygen, you can do so by following these simple steps. First, go to the Window menu and select Preferences. From there, select General and then Appearance. Here, you can choose from a variety of theme options.
To install plug-ins, go to the Help menu and select Eclipse Marketplace. From here, you can search for and install any plug-ins that you need. Alternatively, you can download the plug-in files and install them manually by going to the Install New Software option in the Help menu.
Create A Test Project
Installing Eclipse Oxygen on Windows 10 64 bit is a straightforward process. Here is how to create a new Java project after installation:
| Action | Instruction |
|---|---|
| Create a new project | Go to File menu > New > Java Project. Give your project a name and click “Next”. |
| Configure the project settings | Select a JRE from the list, set the Project Layout as “Create separate folders for sources and class files”, and click “Finish”. |
| Add a new class | Expand the newly created project in the Package Explorer view, right-click on the “src” folder, select New > Class. Give it a name and click “Finish”. |
Now you are ready to write your Java code and start developing your project using Eclipse Oxygen on your Windows 10 64 bit machine!
Run The Project
To run the project in Eclipse Oxygen on Windows 10, you need to open the class file where your project resides. To do this:
- Click on the “Project Explorer” on the left sidebar.
- Double click on the project folder where your class file is located.
Once you have opened the class file in Eclipse Oxygen:
- Add your code to the class.
- Click on “Run” on the Eclipse menu bar, or alternatively, click on the “Run” icon in the Eclipse toolbar.
- The project will be built and executed, and the console window will display the output.
By following these simple steps, you can easily run your Eclipse Oxygen projects on Windows 10 64 bit, without any hassle.

Credit: m.youtube.com
Troubleshooting
During Eclipse Oxygen installation on Windows 10 64 Bit, some common errors might appear, including “JVM terminated. Exit code=1” and “Java was started but returned exit code=13”. To fix the “JVM terminated. Exit code=1” error, update the java version and set environment variables. For the “Java was started but returned exit code=13” error, make sure that the installed Java version is compatible with your Eclipse Oxygen version. Specifically, if you have installed Eclipse Oxygen 64 bit, you must also have installed a 64-bit version of Java.
| Common Error | How to Fix |
|---|---|
| “JVM terminated. Exit code=1” |
|
| “Java was started but returned exit code=13” |
|
Refer to the Eclipse Oxygen installation guide for detailed instructions on how to troubleshoot installation errors. Always ensure that your system meets the minimum requirements for Eclipse Oxygen installation to avoid any potential errors.
Frequently Asked Questions For How Do I Install Eclipse Oxygen On Windows 10 64 Bit
Where Can I Download Eclipse Oxygen?
You can download Eclipse Oxygen from the official Eclipse website.
How To Install Eclipse 64 Bit?
To install Eclipse 64 bit, go to the official Eclipse website, select the 64 bit version of the software, and download the installation file. After downloading, run the file and follow the installation process. Once completed, Eclipse 64 bit will be installed on your computer.
What Is The Version Of Eclipse Oxygen?
The version of Eclipse oxygen is 4. 7.
Why Eclipse Is Not Opening In Windows 10?
The most common reason Eclipse won’t open in Windows 10 is due to an outdated or incompatible Java version. Update your Java SE and check if it’s compatible with Eclipse. Another possibility is a corrupted installation, which can be resolved by reinstalling Eclipse.
Conclusion
Installing Eclipse Oxygen on Windows 10 64 Bit is not as complicated as it may seem. By following the steps detailed you will be able to install Eclipse Oxygen quickly and effortlessly. It is important to make sure that your computer meets the minimum requirements before installing Eclipse.
Once installed, Eclipse Oxygen provides a robust and user-friendly development environment for Java programmers. With Eclipse Oxygen, you can improve your productivity, reduce development time, and create high-quality applications. So, get started with Eclipse Oxygen today to take your Java programming skills to the next level.