
To restart the Windows Update Service in Windows 10, follow these two steps: “Open the Command Prompt as Administrator and enter ‘net stop wuauserv’ followed by ‘net start wuauserv'”. Restarting the Windows Update Service can resolve update-related issues that you may face while using your Windows 10 device.
This service enables automatic downloading and installation of system updates, and when it gets interrupted due to any reason, it can cause update-related issues. Restarting this service forcefully gets it back on track. There are also some other reasons you might want to restart the Windows Update Service, such as the service might be stuck while checking for updates, or Windows 10 is not installing updates.
We will go over all the methods you can use to restart your service.

Credit: www.youtube.com
Checking The Windows Update Service Status
To restart the Windows Update Service in Windows 10, you first need to check its current status using the ‘Services’ app or Command Prompt. Here’s how:
Using The ‘services’ App
- Open the ‘Services’ app by typing ‘services.msc’ in the Windows search bar and clicking on the app.
- In the Services window, scroll down to find ‘Windows Update’ service.
- If the status shows ‘Running’, then the service is already running fine. If it shows ‘Stopped’, then proceed to the next step.
- Right-click on the ‘Windows Update’ service and select ‘Restart’ option from the dropdown menu.
Using The Command Prompt
- Open the Command Prompt as an Administrator.
- Type ‘net stop wuauserv’ command in the prompt. This command will stop the Windows Update service.
- Type ‘net start wuauserv’ command in the prompt to restart the Windows Update service.
- Close the Command Prompt and check if the Windows Update service has restarted successfully.
By following these steps, you can easily restart the Windows Update service in Windows 10 without any hassle.
Restarting The Windows Update Service
To restart the Windows Update Service in your Windows 10 operating system, there are two easy methods to choose from:
Using The ‘services’ App
Firstly, press the ‘Windows logo’ key and the ‘R’ key to open the ‘Run’ tool. Then, type ‘services.msc’ and press ‘Enter’. After that, locate the ‘Windows Update Service’ from the list of options, right-click on it and select the ‘Restart’ option.
Using The Command Prompt
Alternatively, you can open the ‘Command Prompt’ as an administrator. Type the following command and press ‘Enter’:
Then, execute the below-given command:
Finally, check if the Windows Update Service is running properly after restarting it.
Fixing Windows Update Issues Related To The Service
Windows Update is a critical service that keeps your Windows 10 PC up to date with the latest security and feature updates. However, sometimes the service may stop running, or you may run into issues while trying to install updates. Here are two simple solutions you can try to fix Windows Update issues related to the service:
Running The Windows Update Troubleshooter
The Windows Update Troubleshooter is a built-in tool in Windows 10 that helps diagnose and fix common Windows Update problems. To run the troubleshooter, click on the Start button, type “troubleshoot”, and select “Troubleshoot settings”. Scroll down and click on “Windows Update” under “Get up and running”. Select “Run the troubleshooter” and follow the on-screen instructions.
Clearing The Windows Update Cache
Sometimes, Windows Update may get stuck or fail to install updates due to a corrupted Windows Update cache. You can clear the cache and start the update process again by following these steps:
| 1. | Open the Command Prompt as an administrator. |
| 2. | Type the following commands one by one and press Enter after each command: |
net stop wuauserv |
|
net stop cryptSvc |
|
net stop bits |
|
net stop msiserver |
|
| 3. | Rename the C:\Windows\SoftwareDistribution folder to C:\Windows\SoftwareDistribution.old. |
| 4. | Rename the C:\Windows\System32\catroot2 folder to C:\Windows\System32\catroot2.old. |
| 5. | Type the following commands one by one and press Enter after each command: |
net start wuauserv |
|
net start cryptSvc |
|
net start bits |
|
net start msiserver |
|
| 6. | Restart your PC and try running Windows Update again. |
Credit: www.samsung.com
Common Problems And Solutions
Restarting the Windows Update service may resolve various issues related to Windows updates. If Windows Update service is not listed in Services.msc, you can try running the Windows Update troubleshooter. If the service is stuck on stopping or not running, you can follow these steps:
| Steps to restart Windows Update service: |
|---|
| 1. Press Windows key + R to open the run command. |
| 2. Type services.msc and press Enter. |
| 3. Scroll down and locate Windows Update. |
| 4. Right-click on the service and select Properties. |
| 5. Stop the service if it’s already running. |
| 6. Set the Startup type to Automatic and click OK to save the changes. |
| 7. Restart your computer. |
| 8. Open Services.msc again and start the Windows Update service. |
After completing these steps, try to install updates again and check if the issue persists. Keep in mind that restarting the Windows Update service may take some time, so be patient.
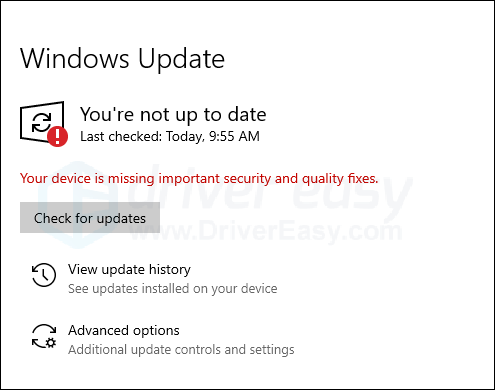
Credit: www.drivereasy.com
Frequently Asked Questions Of How Do I Restart Windows Update Service In Windows 10
How Do I Start Windows Update Service?
To start the Windows Update service, follow these steps: 1) Press the Windows key + R, 2) type “services. msc” and press enter, 3) scroll down to find “Windows Update” and click “Start” from the left panel, 4) close the services window.
How Do I Reset Windows Update Services?
To reset Windows Update services, you need to stop the services, rename the SoftwareDistribution folder and restart the services. Open the command prompt as an administrator and enter the following commands: “net stop wuauserv”, “ren %systemroot%\SoftwareDistribution SoftwareDistribution. old”, “net start wuauserv”.
This process should resolve Windows Update errors.
How Do I Fix Windows 10 Update Service?
To fix the Windows 10 Update service, try restarting it first. If that doesn’t work, you can try running the Windows Update troubleshooter tool or manually resetting the update components. You can also check for any pending updates or disable third-party antivirus software temporarily.
How Do I Resume Windows Update In Windows 10?
To resume Windows Update in Windows 10, go to “Settings” followed by “Update & Security. ” Then, click on “Check for updates” and follow the prompts to download and install any pending updates. If the update is paused, select “Resume updates.
“
Conclusion
In short, restarting Windows Update Service in Windows 10 is crucial to fix various issues, including failed updates or slow downloads. With the help of the steps mentioned you can easily restart the service and keep your system updated.
Remember, keeping your system updated is important not only for its performance but also for its security. Don’t hesitate to carry out this simple process whenever the need arises.