If you’re encountering issues with your Linux Mint installation, fear not! There are several steps you can take to troubleshoot and repair your system. Whether you’re facing boot problems, software issues, or other concerns, this guide will walk you through the process of restoring your Linux Mint installation to a healthy state.
Step 1: Backup Your Data
Before making any changes to your system, it’s crucial to back up your important files and data. You can use external storage devices or cloud services to create a copy of your documents, photos, and other valuable information. This step ensures that your data remains safe throughout the repair process.
Step 2: Check Disk Health
Next, it’s essential to inspect the health of your hard drive or SSD. Linux Mint offers a built-in utility called “Disks” that allows you to assess the condition of your storage device. Open the Disks application, select your drive, and initiate a SMART test to identify any potential hardware issues.
Step 3: Repair Boot Problems
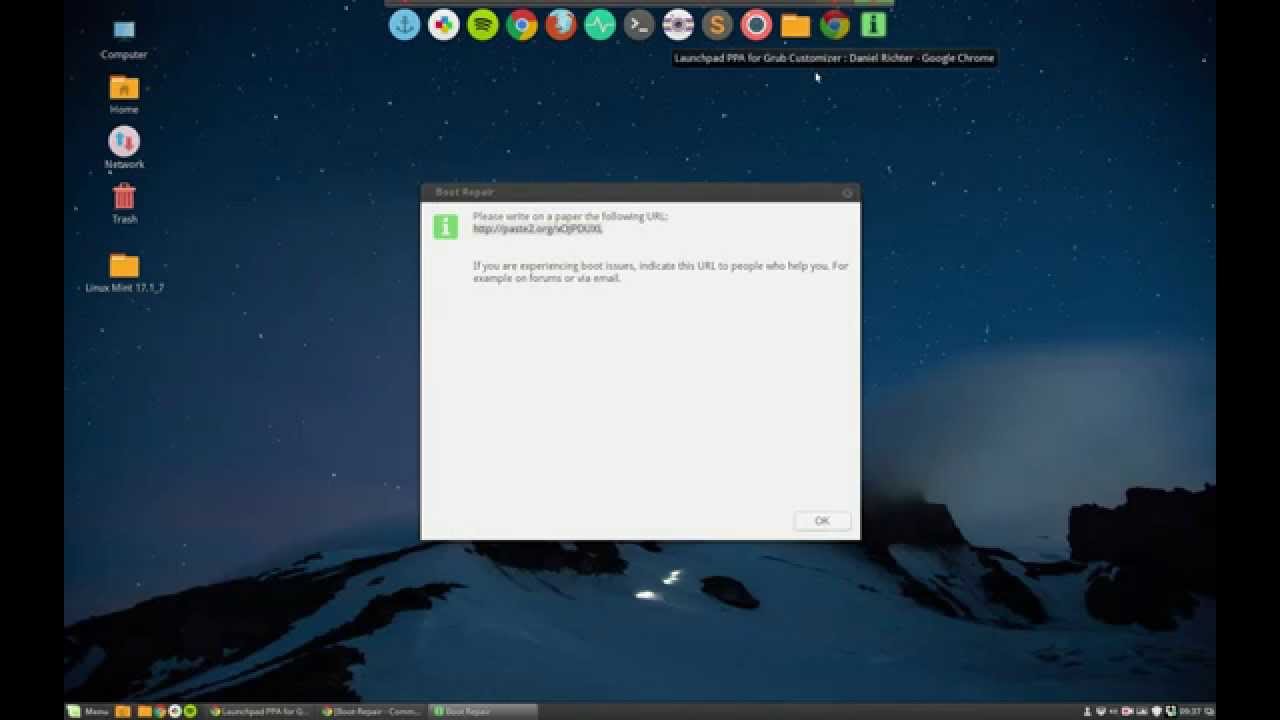
If you’re experiencing boot problems, such as being unable to start Linux Mint, the GRUB bootloader may be a root cause. You can attempt to repair the bootloader using the “Boot Repair” tool. Boot into a live session of Linux Mint, install and launch Boot Repair, and follow the on-screen instructions to fix boot-related issues.
Step 4: Use the Terminal for Software Repair
For software-related issues, the Terminal is a powerful tool for repair and troubleshooting. You can use commands such as “apt-get” and “dpkg” to manage and repair packages on your system. If specific software components are causing problems, you can reinstall or remove them via the command line to resolve the issues.
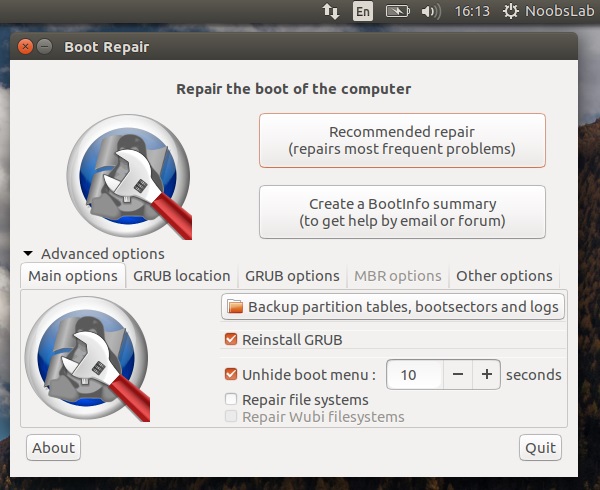
Credit: www.noobslab.com
Step 5: Restore System Settings
If your Linux Mint installation is exhibiting abnormal behavior, it may be beneficial to reset various system settings to their default configurations. The “Timeshift” utility is an excellent tool for creating system snapshots and restoring your system to a previous state. You can revert back to a stable configuration using Timeshift’s intuitive interface.

Credit: www.amazon.com
Step 6: Update and Upgrade
Ensuring that your Linux Mint installation and software packages are up to date is essential for system stability. Utilize the “Update Manager” or the Terminal to check for and install available updates. Additionally, performing a system upgrade to the latest release can address known issues and provide enhanced compatibility.
Step 7: Seek Community Support
If you’re encountering persistent issues with your Linux Mint installation, don’t hesitate to seek assistance from the vibrant Linux community. Forums, discussion boards, and support channels provide valuable insights and solutions from experienced users and developers. Engaging with the community can help you troubleshoot and resolve complex issues.
Conclusion
Repairing your Linux Mint installation is a manageable process that involves data backup, disk health assessment, boot repair, software troubleshooting, system settings restoration, updates and upgrades, and community support. By following these steps, you can effectively address various issues and restore your system to optimal functionality.