To change the unidentified network to private in Windows 7, go to Control Panel, click on Network and Sharing Center, and then select Home network. Windows 7 users might often encounter the problem of an unidentified network, which can lead to issues with sharing files and printers on the network.
Fortunately, this issue can be resolved within minutes. We’ll discuss how to change the unidentified network to private in Windows 7. This is a simple and quick process that requires just a few clicks. Once the network is identified as private, you’ll be able to share files and printers without any problems.
In the following paragraphs, we’ll walk you through the process step by step.

Credit: directaccess.richardhicks.com
Understanding Network Settings
Network settings can be a bit tricky to understand, especially for those who are not tech-savvy. In Windows 7, there are three types of networks: public, private, and domain. The public network is used in public places such as airports and coffee shops, while the private network is used in small offices and homes. The domain network, on the other hand, is used by companies and organizations.
The network settings work by allowing users to configure their devices to connect to specific networks. When you connect to a network and Windows 7 can’t identify it, it will be categorized as an unidentified network. Changing an unidentified network to a private network can be done by following a few simple steps. You need to open the Network and Sharing Center, click on the unidentified network, and choose Home network or Work network depending on your needs. It’s that simple!
Understanding network settings is important because it helps you to take control of your network connections and improve the performance of your devices. It also enhances the security of your network by keeping unauthorized users from accessing it. Knowing how to change unidentified networks to private networks is just one of the many useful skills you can acquire when it comes to managing your network connections in Windows 7.

Credit: www.mdpi.com
Identifying An Unidentified Network
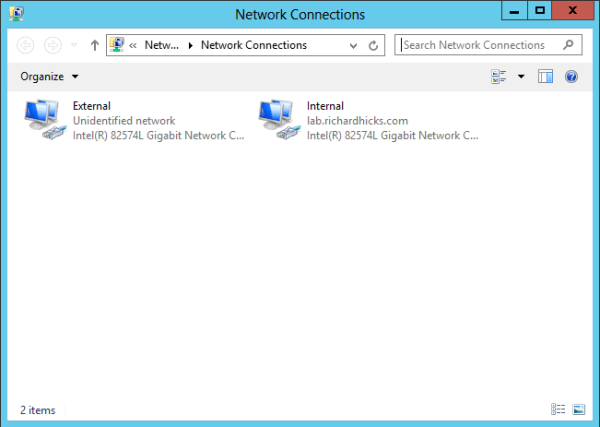
Is your Windows 7 showing an Unidentified Network error message? This issue can be frustrating and confusing, but it is fixable. The symptoms of an unidentified network include no internet access, limited connectivity or a message that says, “unidentified network, no network access”. To check the network status, first, click on the Start button and type “View network connections” in the search box. Then, right-click on your network adapter and click on “Properties”. From there, select the “Networking” tab and check if the network location is set to “Public” or “Private”. If it is set to Public, change it to “Private” and click on “Close”. This should resolve the issue and allow you to access the internet without any problems.
Troubleshooting Unidentified Networks
If you are encountering an “unidentified network” error message while trying to connect to the internet on your Windows 7 machine, there are a few common causes that you should investigate first. One possibility is that there is a problem with your network adapter driver, another is that your firewall or antivirus software is blocking the connection, and a third is that your network settings aren’t configured correctly.
If you’ve ruled out these potential issues, you can begin troubleshooting the unidentified network error with a few simple steps. Firstly, you can try resetting your network adapters by opening the command prompt as an administrator and typing “netsh winsock reset” and “netsh int ip reset” followed by a reboot. If this doesn’t work, you can try disabling and re-enabling your network adapter in the Device Manager or resetting your TCP/IP stack. You may also want to check for any recent updates or changes to your system that could be causing the problem.
By taking these troubleshooting steps and carefully investigating the underlying causes of the unidentified network error, you can get your Windows 7 machine back up and running on the internet in no time.
Changing Network Location To Private
Changing network location to private in Windows 7 is a simple process. You can do this by going to network and sharing center and clicking on the icon for your unidentified network. Next, select “Home network” or “Work network” to make your network private.
If you’re using Windows 7 and unable to access some features on a network, it may be because the network is set to “Unidentified Network.” You can change this to “Private Network” to get easy access to the network. Here are the steps to follow:| Step 1: | Click Start menu, then Control Panel, and choose Network and Internet. |
| Step 2: | Click on Network and Sharing Center, and you’ll see the current network displayed in the center of the page. |
| Step 3: | Click on the network underlined blue text, which opens a new dialog box. |
| Step 4: | In the dialog box, select “Home Network”, “Work Network” or “Public Network” from the three items listed. Choose “Home Network” to have a private network. |
Alternative Solutions
To change an unidentified network to a private network, you can use alternative solutions besides the automatic option in Windows 7. You can use Group Policy Editor or Registry Editor.
Using Group Policy Editor:
Open the Group Policy Editor by typing “gpedit.msc” in the Run dialogue box. Navigate to “Network List Manager Policies” in the left pane, and select the network name that needs to be changed. Double-click “Network Location” in the right pane and set it to “Private”. Click “OK” and exit the editor.
Editing Registry Settings:
To change network settings using Registry Editor, type “regedit” in the Run dialogue box and navigate to “HKEY_LOCAL_MACHINE\SOFTWARE\Microsoft\Windows NT\CurrentVersion\NetworkList\Profiles”. Find the profile of the network you want to change and modify “Category” value to “2”. This will set the network to “Private”. Exit the editor.

Credit: www.altaro.com
Frequently Asked Questions Of How Do I Change Unidentified Network To Private In Windows 7
How To Change Unidentified Network From Public To Private Windows 7?
To change an unidentified network from public to private in Windows 7, navigate to the Control Panel, then click on Network and Sharing Center. Click on the network connection you want to change, then select “Home network” or “Work network” to switch it to a private network.
How Do I Fix Unidentified Network In Windows 7?
To fix an unidentified network in Windows 7, try resetting the TCP/IP stack, updating network drivers, disabling firewall and antivirus temporarily, and lastly, resetting the router. You can also troubleshoot via the Network and Sharing Center, by checking if the Ethernet cable is connected properly, or by releasing and renewing the IP address.
How Do I Set My Network To Private In Windows 7?
To set your network to private in Windows 7, go to the Start menu and open the Control Panel. Click on “Network and Sharing Center” and then select “Change advanced sharing settings. ” Under the “Network discovery” section, choose the option for “Turn on network discovery” for your private network.
How Do I Force My Network To Private?
To force your network to private, go to your network settings and select the option to make it private. This will prevent unauthorized access and keep your network secure.
Conclusion
After going through the different methods discussed you should be able to change your unidentified network to private in Windows 7 without any difficulty. Whether you choose to use the Control Panel, the Registry Editor, or the Command Prompt, carefully following the steps as outlined will ensure you achieve your objective.
It is important to note that choosing a private network setting offers better security for your devices and data. So take advantage of this guide to secure your Windows 7 device today.