To install a virtual network adapter in Windows 10, follow these steps: Go to Device Manager, click on Network Adapters, select Add Legacy Hardware, click Next, choose Install the hardware that I manually select, select Network Adapters, click Next, choose Microsoft and then Microsoft KM-TEST Loopback Adapter, click Next, and then Install. Installing a virtual network adapter in Windows 10 enables you to use internet and network-related simulations.
Virtual network adapters can also be used to connect your computer to a Virtual Private Network (VPN). Virtual adapters are software-based and come in handy when testing network applications, connecting to virtual networks, and creating virtual servers for testing purposes.
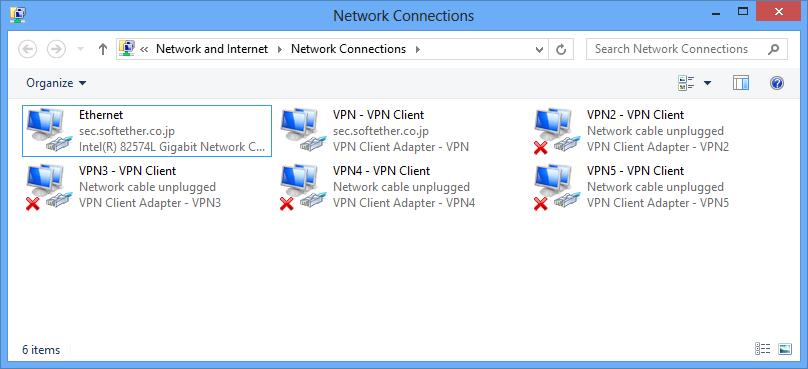
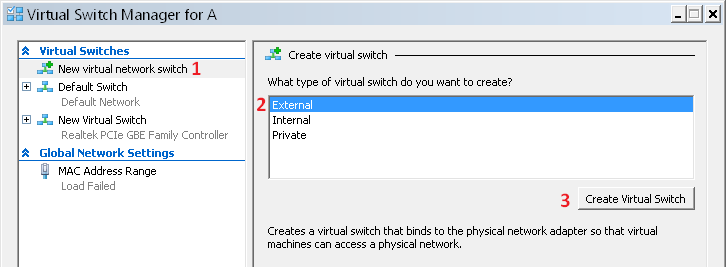
Credit: www.softether.org
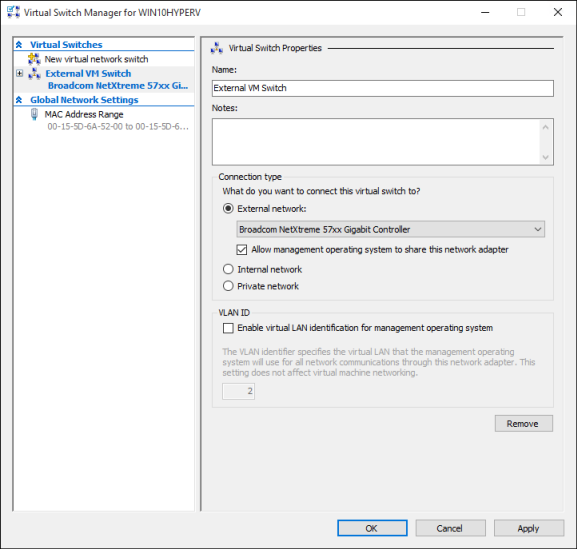
Credit: learn.microsoft.com
Frequently Asked Questions On How Do I Install A Virtual Network Adapter In Windows 10
How Do I Setup A Vm Network Adapter?
To set up a VM network adapter, follow these steps: 1. Open your VM settings and select “Add Hardware. ” 2. Choose “Network Adapter” and click “Add. ” 3. Select the type of network you want and configure the settings.
4. Start your VM and check that the network adapter is enabled. 5. Connect to the network and test the connection.
How Do I Create A Virtual Nic?
To create a virtual NIC, go to the Hyper-V Manager and select the virtual machine. Then, click on “Settings” and select “Add Hardware”. Choose “Network Adapter” and click “Add”. Choose the appropriate virtual switch and click “OK”. The virtual NIC is now created.
How Do I Add A Network Adapter To My Computer?
To add a network adapter to your computer, follow these steps: 1. Turn off your computer and unplug it from power. 2. Open the case of your computer to locate an available PCIe or PCI expansion slot. 3. Insert the network adapter into the slot.
4. Fasten the adapter with screws. 5. Close the computer case, plug it in, and turn it on. The adapter will be automatically detected and installed on your computer.
How To Install Network Adapter Windows 10?
To install a network adapter on Windows 10, follow these steps: 1. Connect the adapter to your computer 2. Go to Device Manager 3. Expand the Network adapters category 4. Right-click on the adapter and select Update Driver 5. Choose the option to search for drivers online and follow the prompts to complete the installation.
Conclusion
In few easy steps given above, you can install a virtual network adapter in Windows 10. The virtual adapter is a great feature, which allows you to connect to the internet and other networks. With a virtual network adapter, you can setup multiple network configurations and test them on your Windows 10 computer.
This feature comes in handy when you are running a lab, testing multiple network configurations or troubleshooting network issues. So, go ahead and give it a try, you won’t be disappointed!