
To move files from C drive to D drive in Windows 7, simply drag and drop them from the C drive to the D drive in Windows Explorer. If you’re running out of space on your computer’s C drive, you may need to move some files to your D drive.
Moving files in Windows 7 is simple and can be done quickly by following a few easy steps. We’ll explore how to move files from your computer’s C drive to the D drive using Windows Explorer. We’ll also discuss some common reasons why people choose to move files to a different drive and include some tips to help you manage your computer’s storage more efficiently.
So, let’s get started!
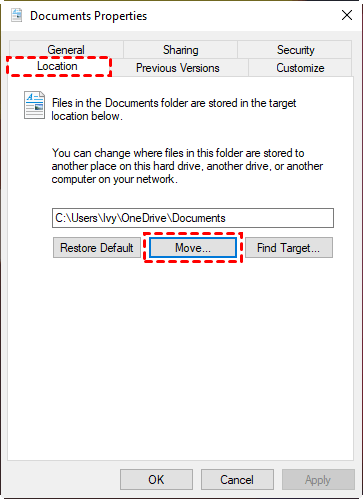
Credit: www.ubackup.com
Locating The Files To Transfer
To locate the files you want to transfer from your C drive to D drive on Windows 7, you can simply open Windows Explorer and navigate to the C drive. Once there, you can search for the files using the search box located in the top right corner of the window. You can also browse through the files manually by opening each folder and subfolder.
It’s important to determine which files you want to transfer before you start the process. You can select individual files or entire folders to move from your C drive to your D drive. It’s recommended that you only transfer files that you will need in the future as transferring unnecessary files can take up valuable space on your D drive.
| C Drive | D Drive |
|---|---|
| Documents | |
| Music | Beatles |
| Videos | Movies |
Use the above table to organize which files you want to transfer from C Drive to D Drive.
Preparing Your D Drive For The Transfer
Ensure your D drive has enough space before transferring files from C drive. You can check the available space by looking at the properties of the D drive. If you don’t have enough space, remove unwanted files or consider upgrading your D drive or computer.
Create a new folder on your D drive to store the transferred files. It’s best to name the folder something that reminds you of the files you’re transferring, such as “photos” or “documents”. This will help you easily locate the files later on.
Using Windows Explorer To Transfer Files
Locating Windows Explorer on your computer is the first step to transfer files from the C drive to the D drive in Windows 7. Once you have opened Windows Explorer, navigate to the C drive and select the files you want to transfer.
You can do this by clicking on the files with your mouse or using the keyboard shortcut of CtrL and A to select all files. Once you have selected the files, right-click and choose Copy.
Now, navigate to your D drive and either right-click and choose Paste or use the keyboard shortcut of CtrL and V to paste the files. Your files should now be successfully transferred from the C drive to the D drive.
| Windows Explorer Action | Keyboard Shortcut |
|---|---|
| Select All Files on C Drive | CtrL + A |
| Copy Selected Files | Right-click and choose Copy or CtrL + C |
| Paste Files on D Drive | Right-click and choose Paste or CtrL + V |

Credit: www.easeus.com
Using Drag And Drop To Transfer Files
To move files from C Drive to D Drive on Windows 7, the easiest way is to use drag and drop method.
| Step 1: | Open Windows Explorer and locate the files you wish to transfer from your C drive. |
| Step 2: | Click and drag the selected files to your D drive, which can be found in the left pane of Windows Explorer under “Computer”. |
| Step 3: | You can either drop the files into the root of D drive or create a new folder by right-clicking and selecting “New Folder”. |
Once you drop the files in the new folder, the transfer process will begin, and you will see a progress dialog box. It may take some time, depending on the number and size of the files.
This method is simple and quick, and it is the most convenient way to transfer files between two drives on your computer.
Using The Command Prompt To Transfer Files
To move files from C drive to D drive on Windows 7, you can use the Command Prompt. Firstly, open the Command Prompt by pressing “WinKey+R” and then typing cmd. Secondly, navigate to the folder containing the files you want to transfer by using the “cd” command. Finally, use the copy command to transfer your files to the desired location. Type “copy C:\FolderName\File.ext D:\NewFolder” and press enter. This will copy the file “File.ext” from C drive folder “FolderName” to D drive folder “NewFolder”. You can also use the “xcopy” command to copy entire folders. This method can be useful when you need to transfer large files or folders that would take a long time to transfer using other methods.
Verifying The Transfer Was Successful
To verify that the transfer was successful, navigate to your D drive. Find the folder where you moved the files and open it. Check each file to ensure that they have been fully transferred. You can also compare the file sizes of the original files in the C drive to those in the D drive to ensure they match. If any files are missing or incomplete, you can try transferring them again.
| Steps to Verify Files |
|---|
| 1. Navigate to D Drive folder |
| 2. Check each file for completeness |
| 3. Compare file sizes to originals |
| 4. Transfer any incomplete files again |
Automating File Transfers With Third-party Software
To move files from the C drive to the D drive in Windows 7, you can automate the file transfer process using third-party software. The first step is to download and install the chosen software. Once the installation is complete, configure the software for use with your C and D drives. This involves ensuring that the C and D drives are both accessible within the software and setting up any necessary permissions. Finally, you can initiate the file transfer either by selecting individual files or by selecting an entire folder. The software will then handle the transfer process automatically, allowing you to move large numbers of files quickly and efficiently.
Best Practices For File Transfers
Before transferring files from your C drive to your D drive on Windows 7, there are a few best practices to keep in mind:
| Perform Backups Before Transferring Files |
| It’s important to create backups of the files you want to transfer in case something goes wrong during the transfer process. |
| Regularly Clean Your Drives to Maximize Space |
| Deleting unnecessary files or programs can free up space on your computer, making the transfer process smoother. |
| Organize Files for Easy Identification and Access |
| Moving files can sometimes lead to confusion or lost files, so it’s important to organize them beforehand for easy identification and access on the new drive. |

Credit: www.easeus.com
Frequently Asked Questions On How Do I Move Files From C Drive To D Drive Windows 7
How Do I Move Files From Local Disk C To D Windows 7?
To move files from local disk C to D in Windows 7, follow these simple steps: 1. Open ‘Computer’ and locate the files to be moved 2. Right-click on the files and select ‘Cut’ 3. Open the D drive and create a new folder (if needed) 4.
Right-click on the new folder and select ‘Paste’ The files will now be moved from C to D drive.
Can I Move All Files From C Drive To D Drive?
Yes, you can move all files from the C drive to the D drive. Simply select the files and folders you wish to move, right-click, and select “Cut. ” Then, navigate to the D drive and right-click again and select “Paste.
” It may take some time depending on the amount of data being moved.
How Do I Move Windows From C To D Drive?
To move Windows from C to D drive, you need to use a disk cloning software that can mirror your current C drive to the D drive. You will need to create a bootable USB or DVD with the software and then follow the software’s instructions to clone the drive.
Once complete, you can change the boot order in your BIOS to boot from the D drive and Windows will load from there.
How Will You Copy And Move A File From E Drive To D Drive?
To copy and move a file from E drive to D drive, simply open the file explorer, go to the E drive, right-click on the file, select “Copy”. Then, go to the D drive, right-click and select “Paste”. The file will be copied and moved to the D drive.
Conclusion
Moving files from C Drive to D Drive on Windows 7 is not a difficult task. You can use various methods such as drag-and-drop, copy and paste, or even use third-party software. It’s important to keep your files organized and move them to D Drive to free up space on your C Drive.
With these simple steps, you can easily move your files and enhance your computer’s performance.